
Split Solid by DTM
To access this screen:
-
Explicit ribbon >> DTM >> Make >> Split by DTM.
-
Wireframe ribbon >> DTM >> Split Solid.
-
Run the command wireframe-split-by-surface.
-
Use the quick key combination "spbd".
Splits a closed wireframe or a selection of triangles representing a solid by a DTM (or selected triangles of a DTM). You may choose to keep the solid above the DTM data or the solid below it. You can output data either to the current object, another object or a new object.
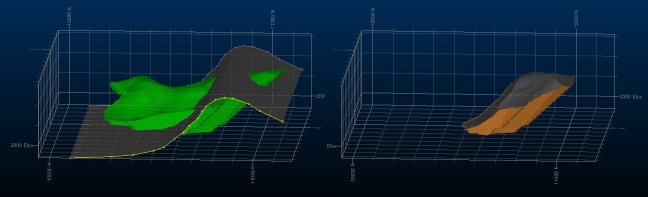
An example of input (left) and output data with Split Solid by DTM
If the solid data input is a closed wireframe and has a clean line of intersection with the DTM input, the new object will also be a closed solid.
This command is the interactive part of the wireframe-split-by-surface command.
Note: This command supports flexible wireframe selection.
Activity steps:
-
Load or create closed wireframe data representing the "solid" to be split.
-
Load or create an open surface (a DTM) to act as the splitting shape.
-
Display the Split Solid by DTM screen.
-
Select the Solid.
-
Either select a wireframe object representing a fully-closed volume, or interactively pick triangle data in one or more wireframe objects in the 3D window (Selected triangles) and use Store current selection to commit it to the command.
-
-
Select the DTM.
-
Select an open surface that fully-intersects the Solid (see above). This cannot be a partial intersection. As above, you can choose either a full surface object or Selected triangles.
-
-
Choose which data to keep after splitting:
-
Keep Solid above DTM – Retain the data that sits on the side of the DTM that represents "up" (according to the wireframe surface normals: "up" could actually be in any direction).
-
Keep Solid below DTM – Keep the data below the DTM after splitting.
-
-
Choose to Output data either within the Current object, an existing wireframe object (pick it from the list) or a new object (type a new name).
-
Click OK to generate split data.
-
Review your data by viewing it in a 3D window.
-
Save your project.
Related topics and activities: